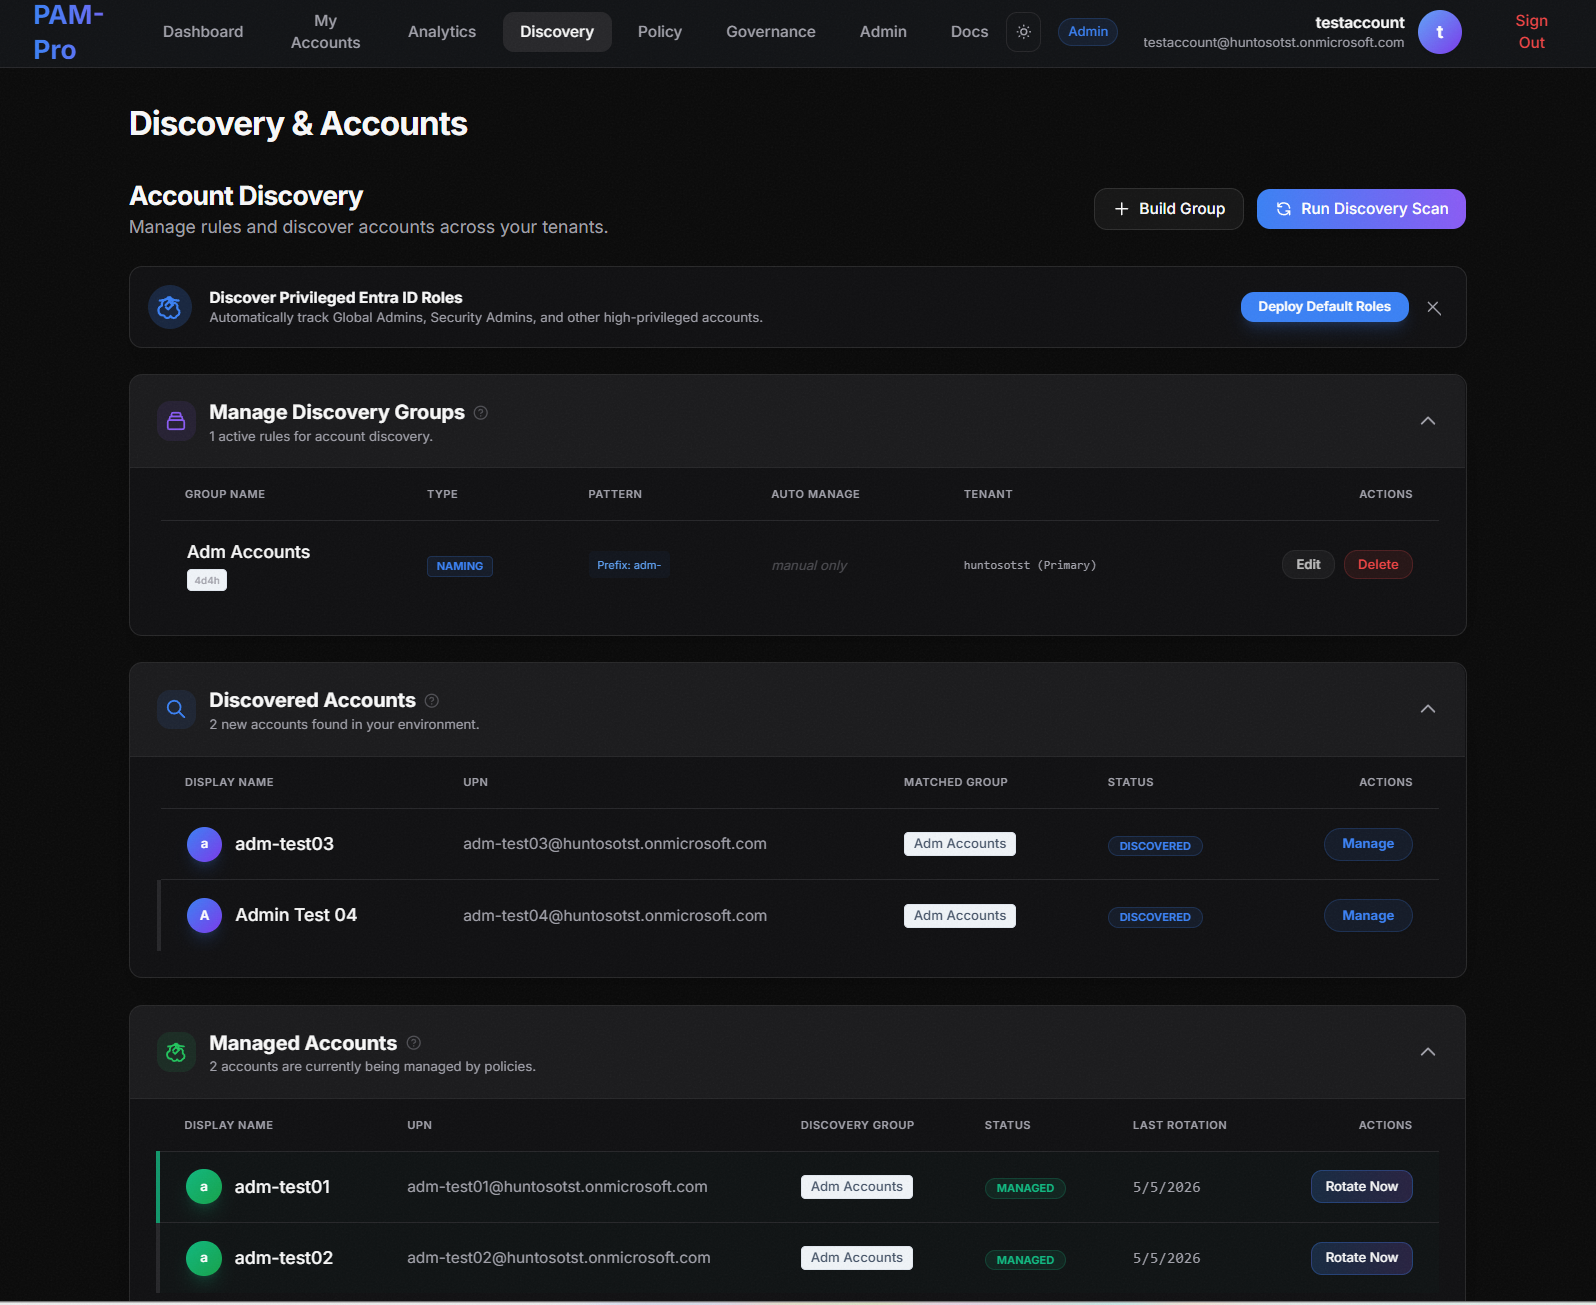
Account Discovery
PAM-Pro automatically identifies privileged accounts across your Microsoft Entra ID tenant by scanning group memberships and directory roles. This ensures zero "dark" administrative accounts exist within your environment.
The Discovery Interface
The Account Discovery page has three panels: the Build a Discovery Group form on the left, the Manage Discovery Groups table in the centre, and the Discovered Accounts and Managed Accounts tables below.
Step 1 - Create a Discovery Group
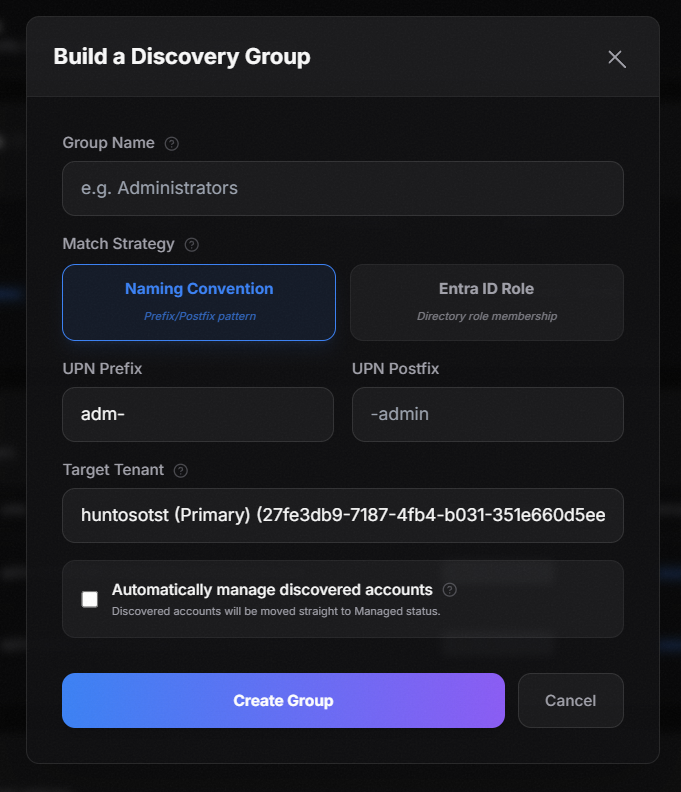
A Discovery Group tells PAM-Pro which accounts to look for. Use a prefix and/or postfix pattern to match your organisation's naming convention for privileged accounts.
- Enter a Group Name (e.g. Administrators).
- Set a Prefix (e.g.
adm-) and/or Postfix (e.g.-admin) to match your account naming convention. - Select the Target Tenant from the dropdown.
- Check Automatically manage discovered accounts to have PAM-Pro take immediate governance of matched accounts.
- Click Create Discovery Group.
Step 2 - Run a Discovery Scan
Once a group is configured, click Run Discovery Scan in the top-right corner of the Manage Discovery Groups panel. PAM-Pro will scan your Entra tenant for accounts matching the group pattern.
The status bar at the bottom of the panel will show "Scan started... fetching accounts matching your groups." while the scan is running. Once complete, matched accounts appear in the Discovered Accounts table below.
Step 3 - Review and Promote Discovered Accounts
Discovered accounts appear in the Discovered Accounts section with their Display Name, UPN, and the Discovery Group that matched them. From here you can:
- Click Add to Managed to bring individual accounts under PAM-Pro governance.
- If Auto Manage was enabled on the Discovery Group, accounts are promoted automatically.
Promoted accounts move to the Managed Accounts table and are now subject to your configured policies, rotation schedules, and JIT workflows.
© 2026 Huntoso LLC. All rights reserved.