Environment Setup - SaaS
Your PAM-Pro SaaS tenant is provisioned and your Microsoft connection is authorised. This guide walks through the remaining configuration steps to get your environment ready for day-to-day privileged access management.
Step 1 - Add Your First Managed Tenant
In the PAM-Pro portal, navigate to Tenant Management › Add Tenant. A tenant in PAM-Pro represents a Microsoft Entra directory that PAM-Pro will monitor and manage.
- Enter a friendly display name for the tenant (e.g. Contoso Production).
- Confirm the Entra Tenant ID auto-populated from your sign-in. If you manage multiple directories, add each one separately.
- Select the account discovery scope - choose whether PAM-Pro should discover all accounts or only those within specified OUs or security groups.
- Click Save & Connect. PAM-Pro will validate the connection and import the initial account inventory.
If you manage multiple Microsoft tenants, you can add each one from the same Tenant Management screen. Each tenant is managed independently with its own policies and audit trail.
Step 2 - Configure SSO Settings
PAM-Pro uses your Microsoft Entra credentials by default (inherited from the authorisation step during onboarding). If your organisation uses a third-party identity provider such as Okta or Ping, configure that here.
Navigate to Settings › Single Sign-On:
- For Microsoft Entra SSO - verify the app registration is listed as active. No further action is required.
- For SAML 2.0 (third-party IdP) - upload your IdP metadata XML and map the required claim attributes (
email,upn,groups). - For OIDC (third-party IdP) - enter your issuer URL, client ID, and client secret.
Click Test Connection to validate your SSO configuration before saving.
Step 3 - Enable Email Notifications
PAM-Pro sends email alerts for access requests, approvals, and security events. Navigate to Settings › Notifications to configure recipients and alert thresholds.
- Add administrator email addresses to receive approval requests and high-severity alerts.
- Configure escalation rules - set how long an approval request can remain pending before an escalation email is triggered.
- Enable or disable user-facing notifications so requestors receive confirmation emails when their requests are approved or denied.
PAM-Pro SaaS uses Huntoso's managed email infrastructure - no SMTP server configuration is required.
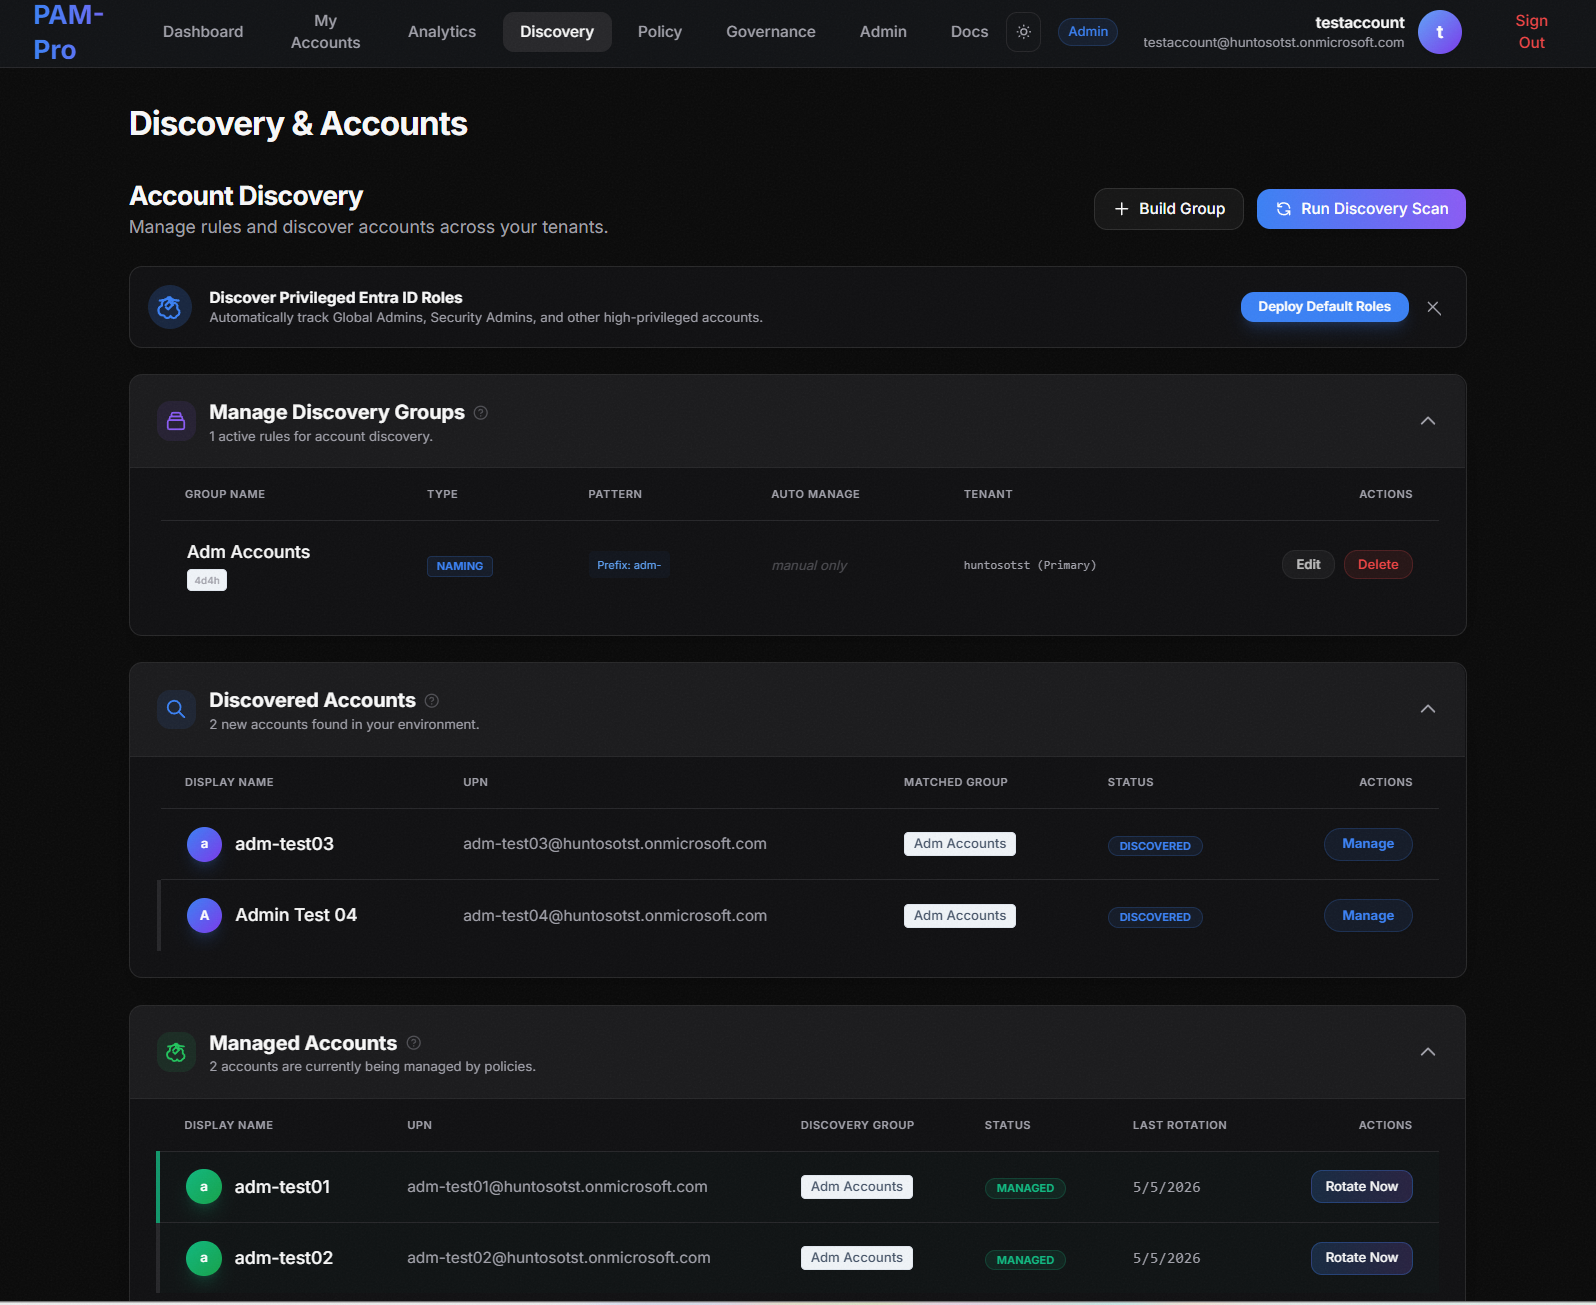
Step 4 - Run Initial Account Discovery
Account discovery scans your connected Microsoft Entra tenant and builds the initial inventory of privileged accounts that PAM-Pro will govern.
Navigate to Account Governance › Account Discovery and click Run Discovery Now. The scan will:
- Enumerate all accounts assigned to privileged Entra roles (Global Administrator, Privileged Role Administrator, etc.).
- Identify accounts with standing permanent access to high-value roles.
- Surface accounts that exist outside of PAM-Pro's governed scope (shadow admins).
Once the scan completes, review the results and click Import to Managed Accounts to bring discovered accounts under PAM-Pro governance.
Step 5 - Configure Auto-Assignment Rules (Optional)
Auto-assignment rules automatically link managed accounts to the correct users without manual assignment. Navigate to Settings › Assignments to configure these rules.
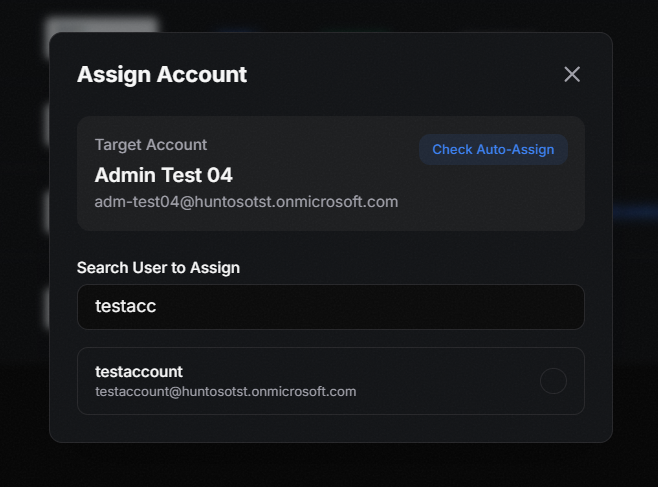
- Employee ID Match - Assigns a managed account to a user when their Employee IDs match. Useful for accounts provisioned with a consistent employee ID attribute.
- User Principal Name (UPN) Match - Assigns an account to a user when the account UPN (minus the discovery group prefix/postfix) matches the user's UPN. For example, if your discovery group uses the prefix
ADM-, the account[email protected]will auto-assign to user[email protected].
Enable the rules that match your environment's account naming conventions and click Run Assignment Now to apply immediately.
Step 6 - Review System Settings
Navigate to Settings › System to review two critical configuration areas before going live.
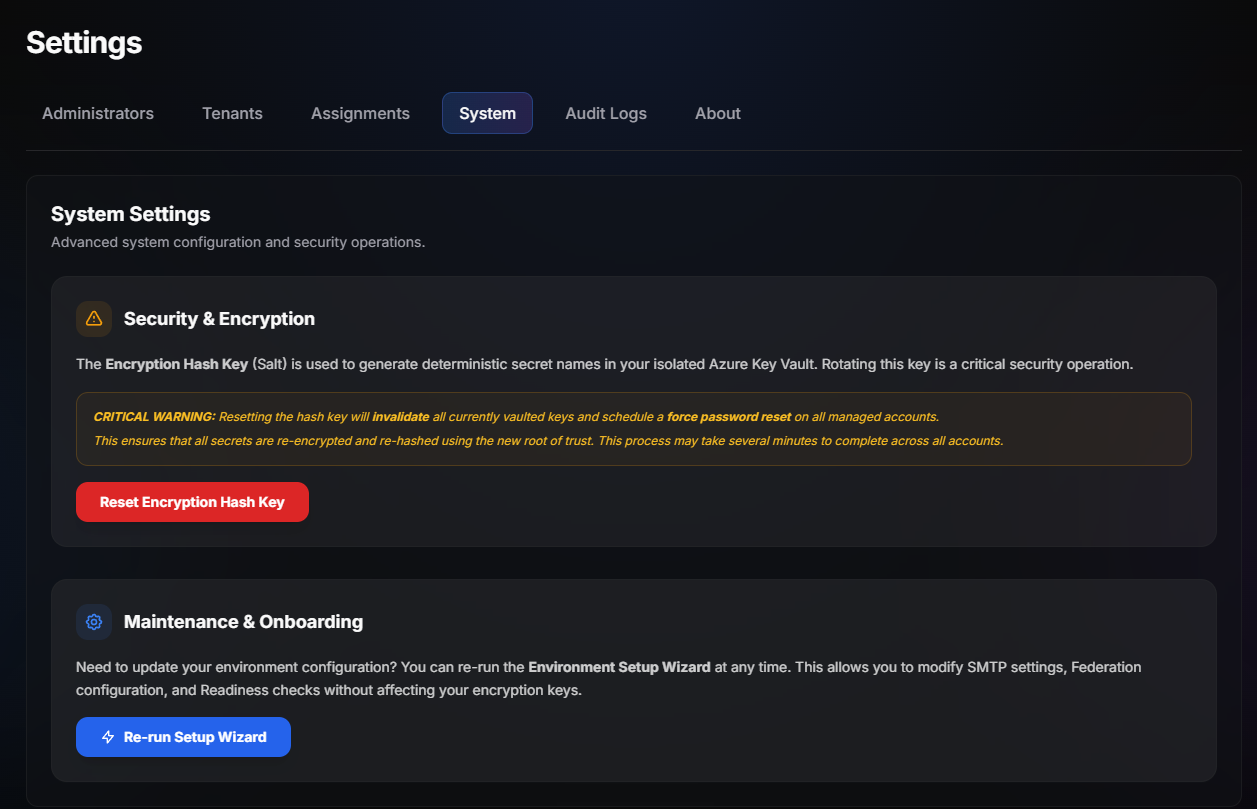
- Security & Encryption - Shows the current state of your Encryption Hash Key (Salt). This key generates deterministic secret names in your Azure Key Vault. Do not rotate this key unless instructed - rotating it invalidates all currently vaulted keys and forces a password reset on all managed accounts.
- Maintenance & Onboarding - The Re-run Setup Wizard button lets you update SMTP settings, federation configuration, and readiness checks at any time without affecting your encryption keys.
Step 7 - Test a JIT Access Request
Verify end-to-end functionality by simulating a Just-In-Time elevation request before going live.
- Navigate to Access Workflows › Request Elevation.
- Select a managed account and choose a privileged role (e.g. Global Administrator).
- Set a short duration - 1 hour is suitable for a test.
- Enter a justification and click Submit Request.
- Switch to your approver account and navigate to Access Workflows › Approvals.
- Approve the request and confirm the account is elevated in Entra PIM.
- Verify the audit entry is recorded under Audit › Audit Trail.
You're live. PAM-Pro is configured and your environment is ready for privileged access management. Review the Policy Management documentation to define access policies that match your compliance requirements.
Environment Setup - On-Premises
The PAM-Pro application is installed. This guide walks through the post-installation configuration steps to connect your environment, add your first tenant, and validate the deployment before going live.
Step 1 - Run the Environment Initialisation Script
Once the primary installer has completed, run the environment initialisation script. This script applies your organisation-specific settings and connects PAM-Pro to your Microsoft Entra tenant.
.\Initialize-Environment.ps1 `
    -TenantId "xxxxxxxx-xxxx-xxxx-xxxx-xxxxxxxxxxxx" `
    -PamProBaseUrl "https://pam.contoso.com" `
    -SmtpServer "smtp.contoso.com" `
    -SmtpSenderAddress "[email protected]"
The script will:
- Register the PAM-Pro redirect URIs with your Entra app registration.
- Write the SMTP configuration to the PAM-Pro application database.
- Generate the initial encryption keys and store them in Windows DPAPI (or an optional Azure Key Vault if configured).
- Perform a connectivity test against Microsoft Graph, your SQL Server, and the SMTP relay.
Key Vault (optional): For production deployments, it is strongly recommended to store encryption keys in Azure Key Vault rather than DPAPI. Add -KeyVaultUri "https://your-vault.vault.azure.net" to the command above to enable this.
Step 2 - Add Your First Tenant via the Setup Wizard
Open a browser and navigate to your PAM-Pro URL (e.g. https://pam.contoso.com). On first load, the setup wizard will launch automatically.
- Sign in with the Global Administrator account used during installation.
- Review and accept the PAM-Pro licence agreement.
- On the Tenant Configuration step, confirm the pre-populated Entra Tenant ID and primary domain. Click Connect.
- A Microsoft consent prompt will appear - click Accept to grant PAM-Pro the required Graph API permissions.
- Complete the remaining wizard steps to configure your display name, time zone, and retention policies.
Step 3 - Configure SSO
Navigate to Settings › Single Sign-On in the PAM-Pro admin console.
- For Microsoft Entra OIDC - enter the Entra Tenant ID, Application (Client) ID, and Client Secret from your app registration. PAM-Pro will validate and save the configuration automatically.
- For SAML 2.0 - upload your IdP metadata XML and map the required claim attributes (
email,upn,groups). - Set the default authentication method and click Test Connection before saving.
Step 4 - Configure SMTP (Email Alerts)
Navigate to Settings › Alert Delivery and complete the SMTP configuration:
- Enter your SMTP relay hostname and port (typically 587 for TLS, 25 for relay without auth).
- Enter credentials if your relay requires authentication.
- Set the sender name and sender email address.
- Click Send Test Email to validate delivery. Check the target inbox before saving.
All outbound alert emails, approval notifications, and escalation messages are routed through this SMTP configuration. Ensure the relay is reachable from the PAM-Pro server and that the sender domain has appropriate SPF/DKIM records.
Step 5 - Run Initial Account Discovery
Navigate to Account Governance › Account Discovery and click Run Discovery Now. The discovery agent will scan your connected Microsoft Entra tenant and on-premises Active Directory (if configured) to build the privileged account inventory.
- Review discovered accounts flagged as Unmanaged Privileged - these accounts have standing access to high-value roles but are not yet governed by PAM-Pro.
- Select accounts to import and click Add to Managed Accounts.
- Assign each account to an appropriate access policy that defines who can request elevation and under what conditions.
Step 6 - Test a JIT Access Request
Validate the full request-and-approval workflow before rolling out to users.
- Navigate to Access Workflows › Request Elevation.
- Select a managed privileged account and choose a role.
- Set a 1-hour duration, enter a test justification, and click Submit Request.
- Log in as the designated approver and navigate to Access Workflows › Approvals.
- Approve the request and verify the role is granted in Entra PIM (or your configured identity provider).
- Confirm the session is recorded in Audit › Audit Trail.
Deployment complete. Your on-premises PAM-Pro instance is operational. Proceed to Policy Management to define access policies tailored to your organisation's security and compliance requirements.
© 2026 Huntoso LLC. All rights reserved.